
Christmas is almost here and that means decorating is in full force at my house. I love to use fresh greens in arrangements, on the mantle and of course, in wreaths. But they tend to dry out quickly and (sigh) the needles fall off way before the season is over. So this year, instead of hanging a “real” wreath indoors, I decided to make a burlap wreath.
We have a new wreath tutorial site – How to Make a Burlap Wreath.com

Reinventing the Wreath: A Charming Country Decoration to Hang Indoors
By Merri Cvetan

Burlap is all the rage in home décor, table settings and DIY projects. I love the rough texture of the fabric, especially when it’s paired with something soft or used in an unusual way. It’s perfect for a festive, county-style wreath.
Materials Needed:
- 1 ½ yards green burlap (45″wide)
- You can buy burlap ribbon, but it’s very expensive. I found bolts of it at a local fabric store on sale for $2.99 a yard.
- Burlap is generally sold in its natural color, but because it’s so popular, you will find it dyed in variety of colors and prints. This bright green screamed Christmas and just made me happy!
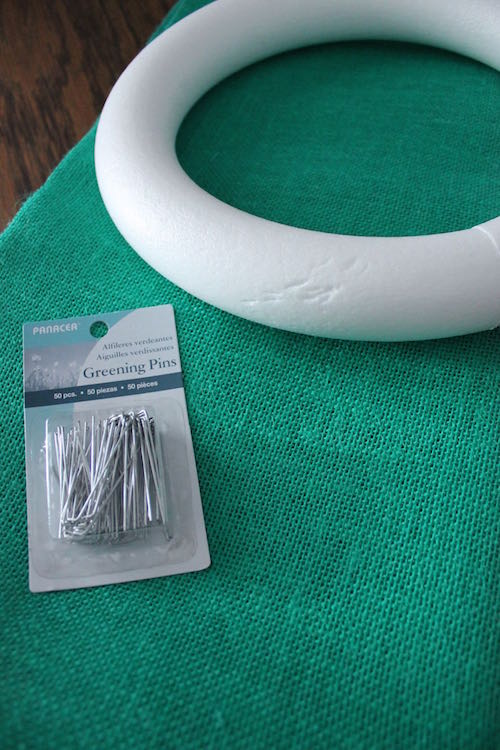
- 12″ foam wreath
- Greening Pins and/or large head quilting pins
- Decorative ornaments
- Ribbon for hanging
Directions:
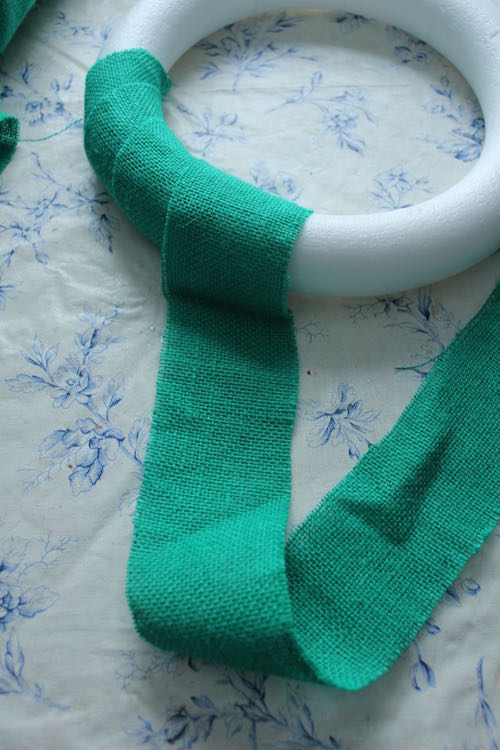
1. Cut 3″ wide (by 45″ long) strips from the burlap and wrap them around the foam. You could skip this step if you purchased a green wreath or spray painted a white one.
2. It will take five or six strips to cover the entire wreath. Slightly overlap each strip and hold in place with the quilting pins.
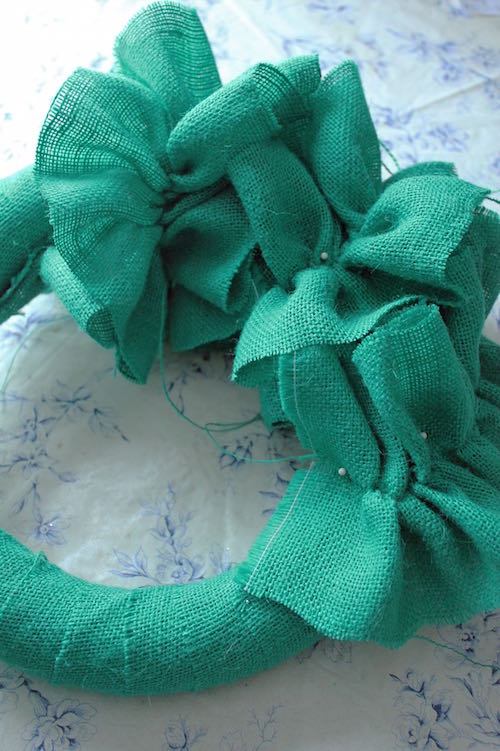
3. Cut out eight strips, each 6″ wide (by 45″ long) to make the “ruffles.”. Make gathers by pulling the center thread. But don’t pull it all the way through! Since burlap is a loosely woven fabric, it’s easy to create a nice soft ruffle. Unravel the long edges by pulling out loose threads. It will unravel anyway and the frayed edges will give it a softer look.

4. Pin one end of a “ruffled” strip to the wreath with a quilting pin. Wrap the ruffle around the foam, pinning it every 4-5 inches. Don’t push the pins all the way in; you will be replacing them with the greening pins. Slightly overlap each row; you want to make sure the foam is completely covered.

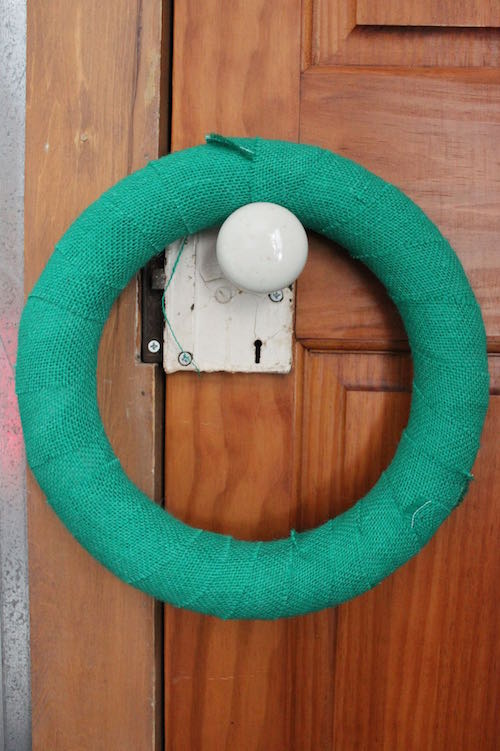
5. Hang the wreath at eye level to check that it is completely covered and to make adjustments, if necessary. Replace the quilting pins with the greening pins (you don’t want the white heads to show). The greening pins have two prongs and will securely hold the ruffles in place. Cut off all the loose threads.
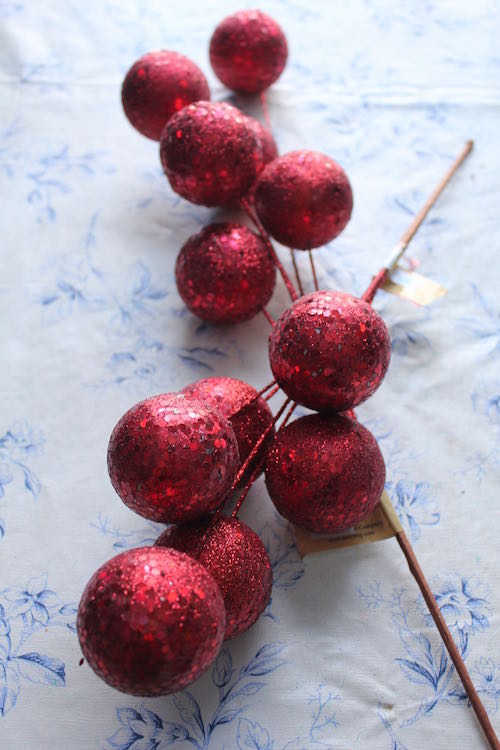
You can use any ornament to add color to the wreath. I found a holiday floral spray with six foam ornament balls on wire sticks. They are red and sparkly and glittery; the perfect contrast to the rough burlap fabric. Cut off the excess wire. You will need less than 3″. If you use any other ornament, attach it to the wreath with a hot glue gun.
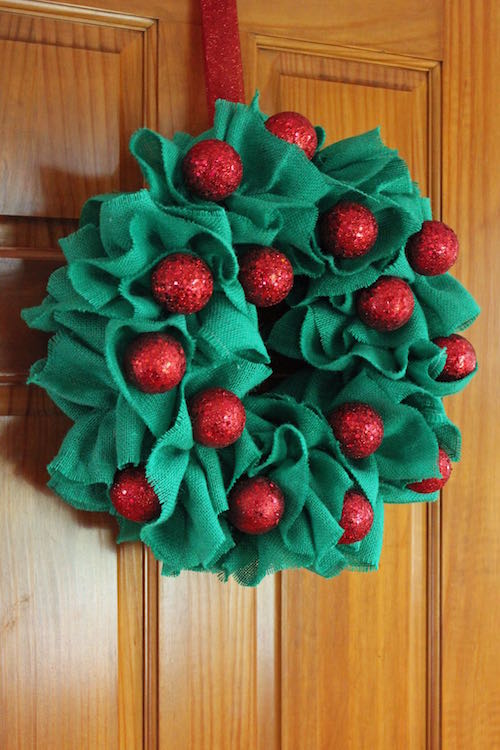
Lay out the ornaments on the wreath and rearrange until you get a pattern you like. Try an all-over random lay-out or try three groups of three. Remember the trusty old design tip: everything looks better in odd numbers!
Pin a piece of ribbon to the top for hanging. The length will depend on where you put it. This wreath will last the whole season and you can use it year after year. Perhaps next year, I’ll replace the red balls with purple or silver ones. I guess it will depend on my color scheme next year!
Interior designer Merri Cvetan writes about her DIY holiday craft projects for Home Depot. Merri’s wreath now adorns her century-old farmhouse home. Home Depot’s full selection of holiday decorations can be found at Home Depot.
For more holiday DIY ideas on Stagetecture, click here.
For more burlap wreath ideas visit our new site – How to Make a Burlap Wreath.com
Receive Stagetecture's Daily Lifestyle Ideas
FREE - Daily emails with recipes, home decor, D.I.Y, and lifestyle tips! : ) Who doesn't need help?


Leave a Reply