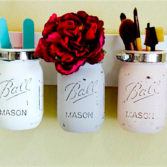
It’s back to school time and time, so why not make a fun DIY project to get into the Back to School mood? This one is an easy tutorial to make your own pencil case by upcycling a cardboard tube. The best thing about it is that you can choose any fabric you like and give it an individual, one-of-a-kind look, by adding any decorations you would want to use or even using initials. It would also make a wonderful, thoughtful gift that will accompany the lucky person throughout the school year.
Back to School: DIY Pencil Case (Video)

DIY pencil cases
Image via: Sew Mama Sew
Supplies
- 8″ cardboard tube
- Scissors
- 8″ zipper
- Hot glue or fabric glue
- Cloth/fabric cut to about 11″ x 15″ and two smaller pieces
- Pencil
- Embellishments (buttons, stickers, ribbons, letters etc. – optional)
Watch a video on how to make this cute pencil case.
You can find the link to the video here.
Directions
- Start with preparing the cardboard tube by cutting it open lengthwise.
- Take the zipper and apply some hot glue on the long side. Glue the zipper to the long side of the cardboard tube.
- Next, apply some hot glue to the other long side of the cardboard tube on the outside, and secure the other long side of the zipper to it.
- Now take a small piece of the fabric and use the cardboard tube and the pencil to trace a circle as big as the opening of the cardboard tube. Repeat the same process so you will have two circular fabric tracings. Cut out the fabric circles, adding about ½ inch around the circle (so you will end up with a slightly larger fabric circle than the cardboard opening).
- Now make some small cuts into the fabric, just until the inner circle you have traced with the pencil. Those cuts will help to have a nice finish when you glue the fabric to the tube.
- Apply some hot glue to the edge of the tube and glue the fabric circle to it. Apply a little more glue just below the edge of the tube and fold the excessive fabric to glue it to the tube.
- Repeat the steps 6 and 7 on the other side of the tube.
- Now it’s time to cover the rest of the tube. In order to do that, take the large piece of fabric and place it face down on a flat surface. Fold about ½ of the three sides (two short and one long side) of the fabric and glue them to hold in place. When the glue has dried, place the tube on the fabric and glue the already glued long side of the fabric to one edge of the zipper. Wrap the fabric around the tube, applying a little glue here and there. When you have wrapped the whole tube, adjust the fabric by folding the excess fabric and gluing it, so the edge of the fabric can be glued to the free edge of the zipper. Glue the edges together and you are done with the basics.
- You can now attach your embellishments to the pencil case to give it an even more individual look.
This Back to School DIY project can be completed in no time as long as you have all supplies together. You can make a pencil case without a tube by following the same instructions, but using some kind of sturdy lining or thicker fabric is recommended so the pencil case will keep its shape for a longer time.
For more back to school ideas on Stagetecture, click here.
Receive Stagetecture's Daily Lifestyle Ideas
FREE - Daily emails with recipes, home decor, D.I.Y, and lifestyle tips! : ) Who doesn't need help?


Leave a Reply